Policies
A flexible rules engine with triggers and actions
Overview
While the three Castle risk scores provide a good starting point for weeding out fraudulent behavior, Policies is the foundation that lets you implement business domain specific rules to make sure you're catching fraud specific to your platform.
With policies, it is easy to set up rules for e.g.
- Denying transactions over $500, happening from non-US countries and from new accounts
- Challenging logins with too many prior failed attempts from the same IP
- Preventing signups from devices with multiple prior accounts connected to it
Policies are applied when Castle's /risk or /filter API endpoints are called, and each API response will contain a policy object with the matching policies, as well as a policy.action field set to allow, challenge, or deny.
How policies work
Triggers and Actions
The basics of a policy consists of configuring two types of settings:
The Trigger, which is the condition that will activate the Policy, such as matching
- A specific Event type
- The contents of one or many Lists
- Risk score and signal settings
Once the triggering conditions are defined, you'll configure what will happen whenever they are met, i.e. the Action
- Returned API action,
allow,challengeordeny - Whether an item should be added to one or many lists
Organization
Policies are grouped by event name to give you a better understanding of the actions taken throughout the different points in your application. These events include registrations, logins, profile updates, transactions, and password resets.
In addition to being grouped by event name, there are two special groups, "Before all events" and "After all events", where you can place Policies that should be applied to all events. For instance when setting up a global blocklist
Policies are evaluated in order, from top to bottom, for each event grouping. You can easily re-order them as you see fit. The most narrow-scope and restrictive policies (i.e. deny) should usually be at the top of the list because they should be evaluated for matches first. Unless you have certain behavior that you always want to allow, such as test traffic from certain IPs or similar, then this will go at the top.
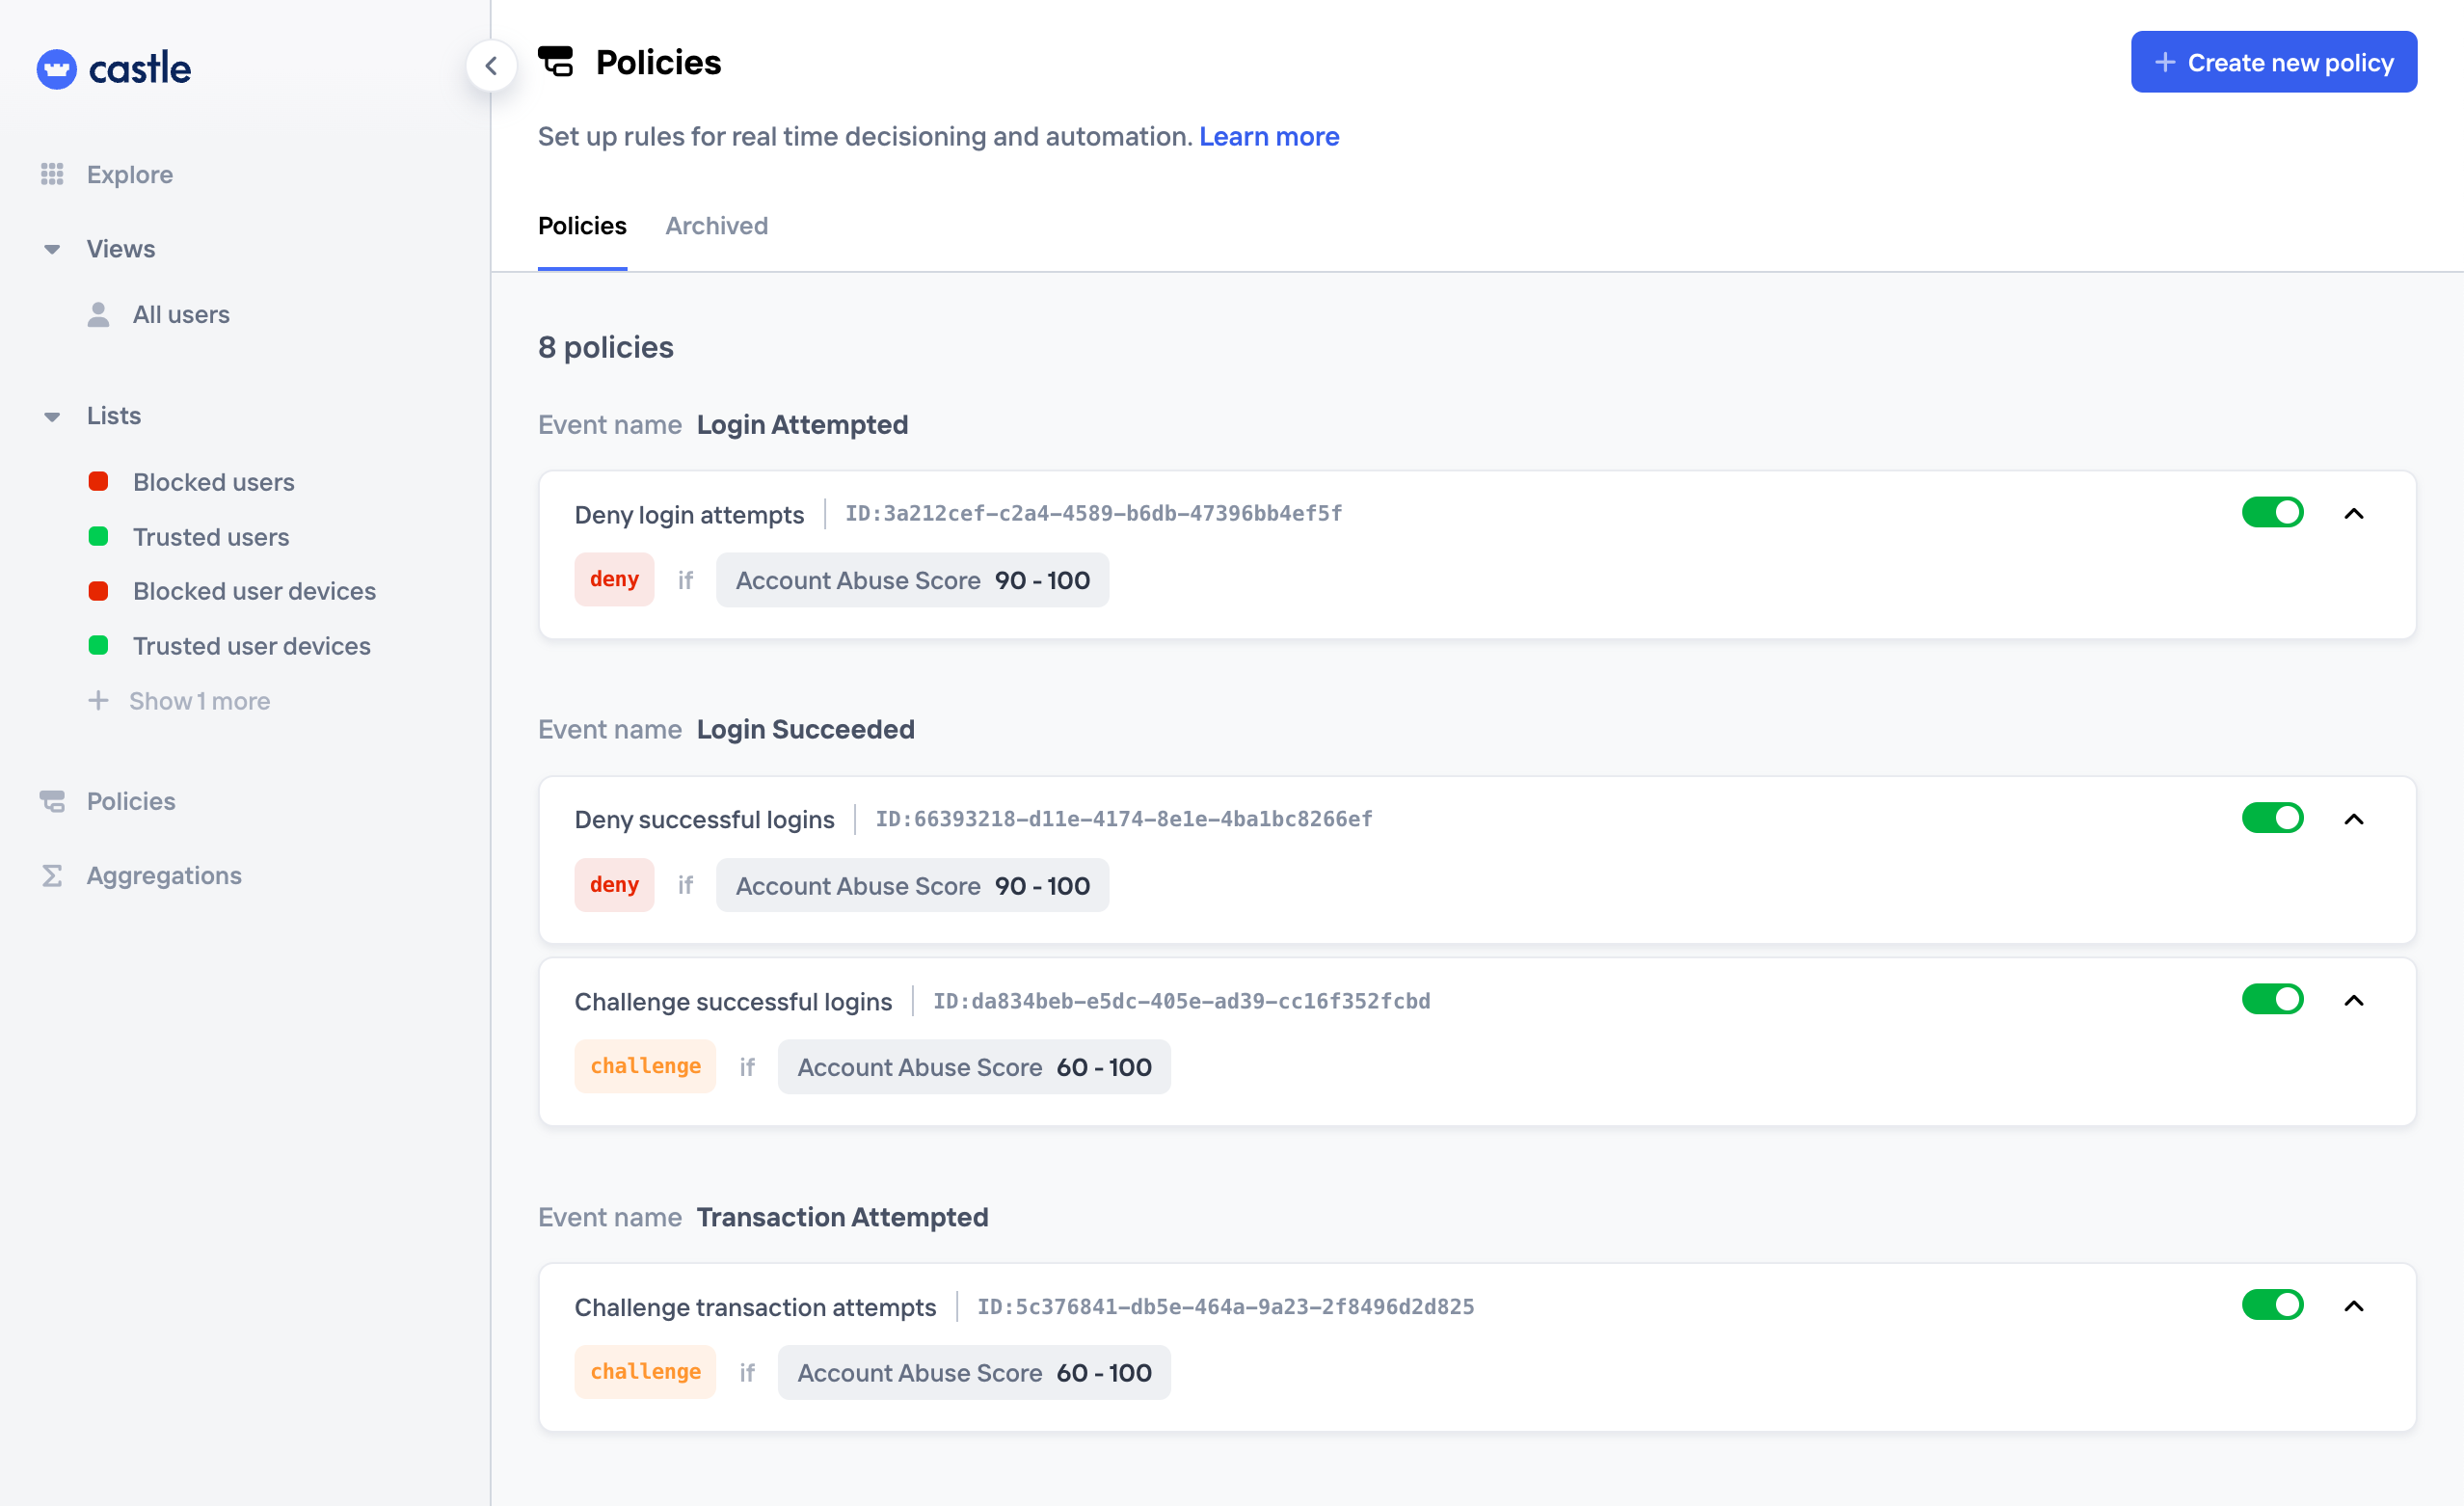
List of Policies, grouped by event name
Creating a policy
Creating a Policy is as easy as creating a filter in the Explore view. After giving the policy a name and setting the desired "Inline response" you simply add all the conditions to the "When" section in the form for creating a new policy
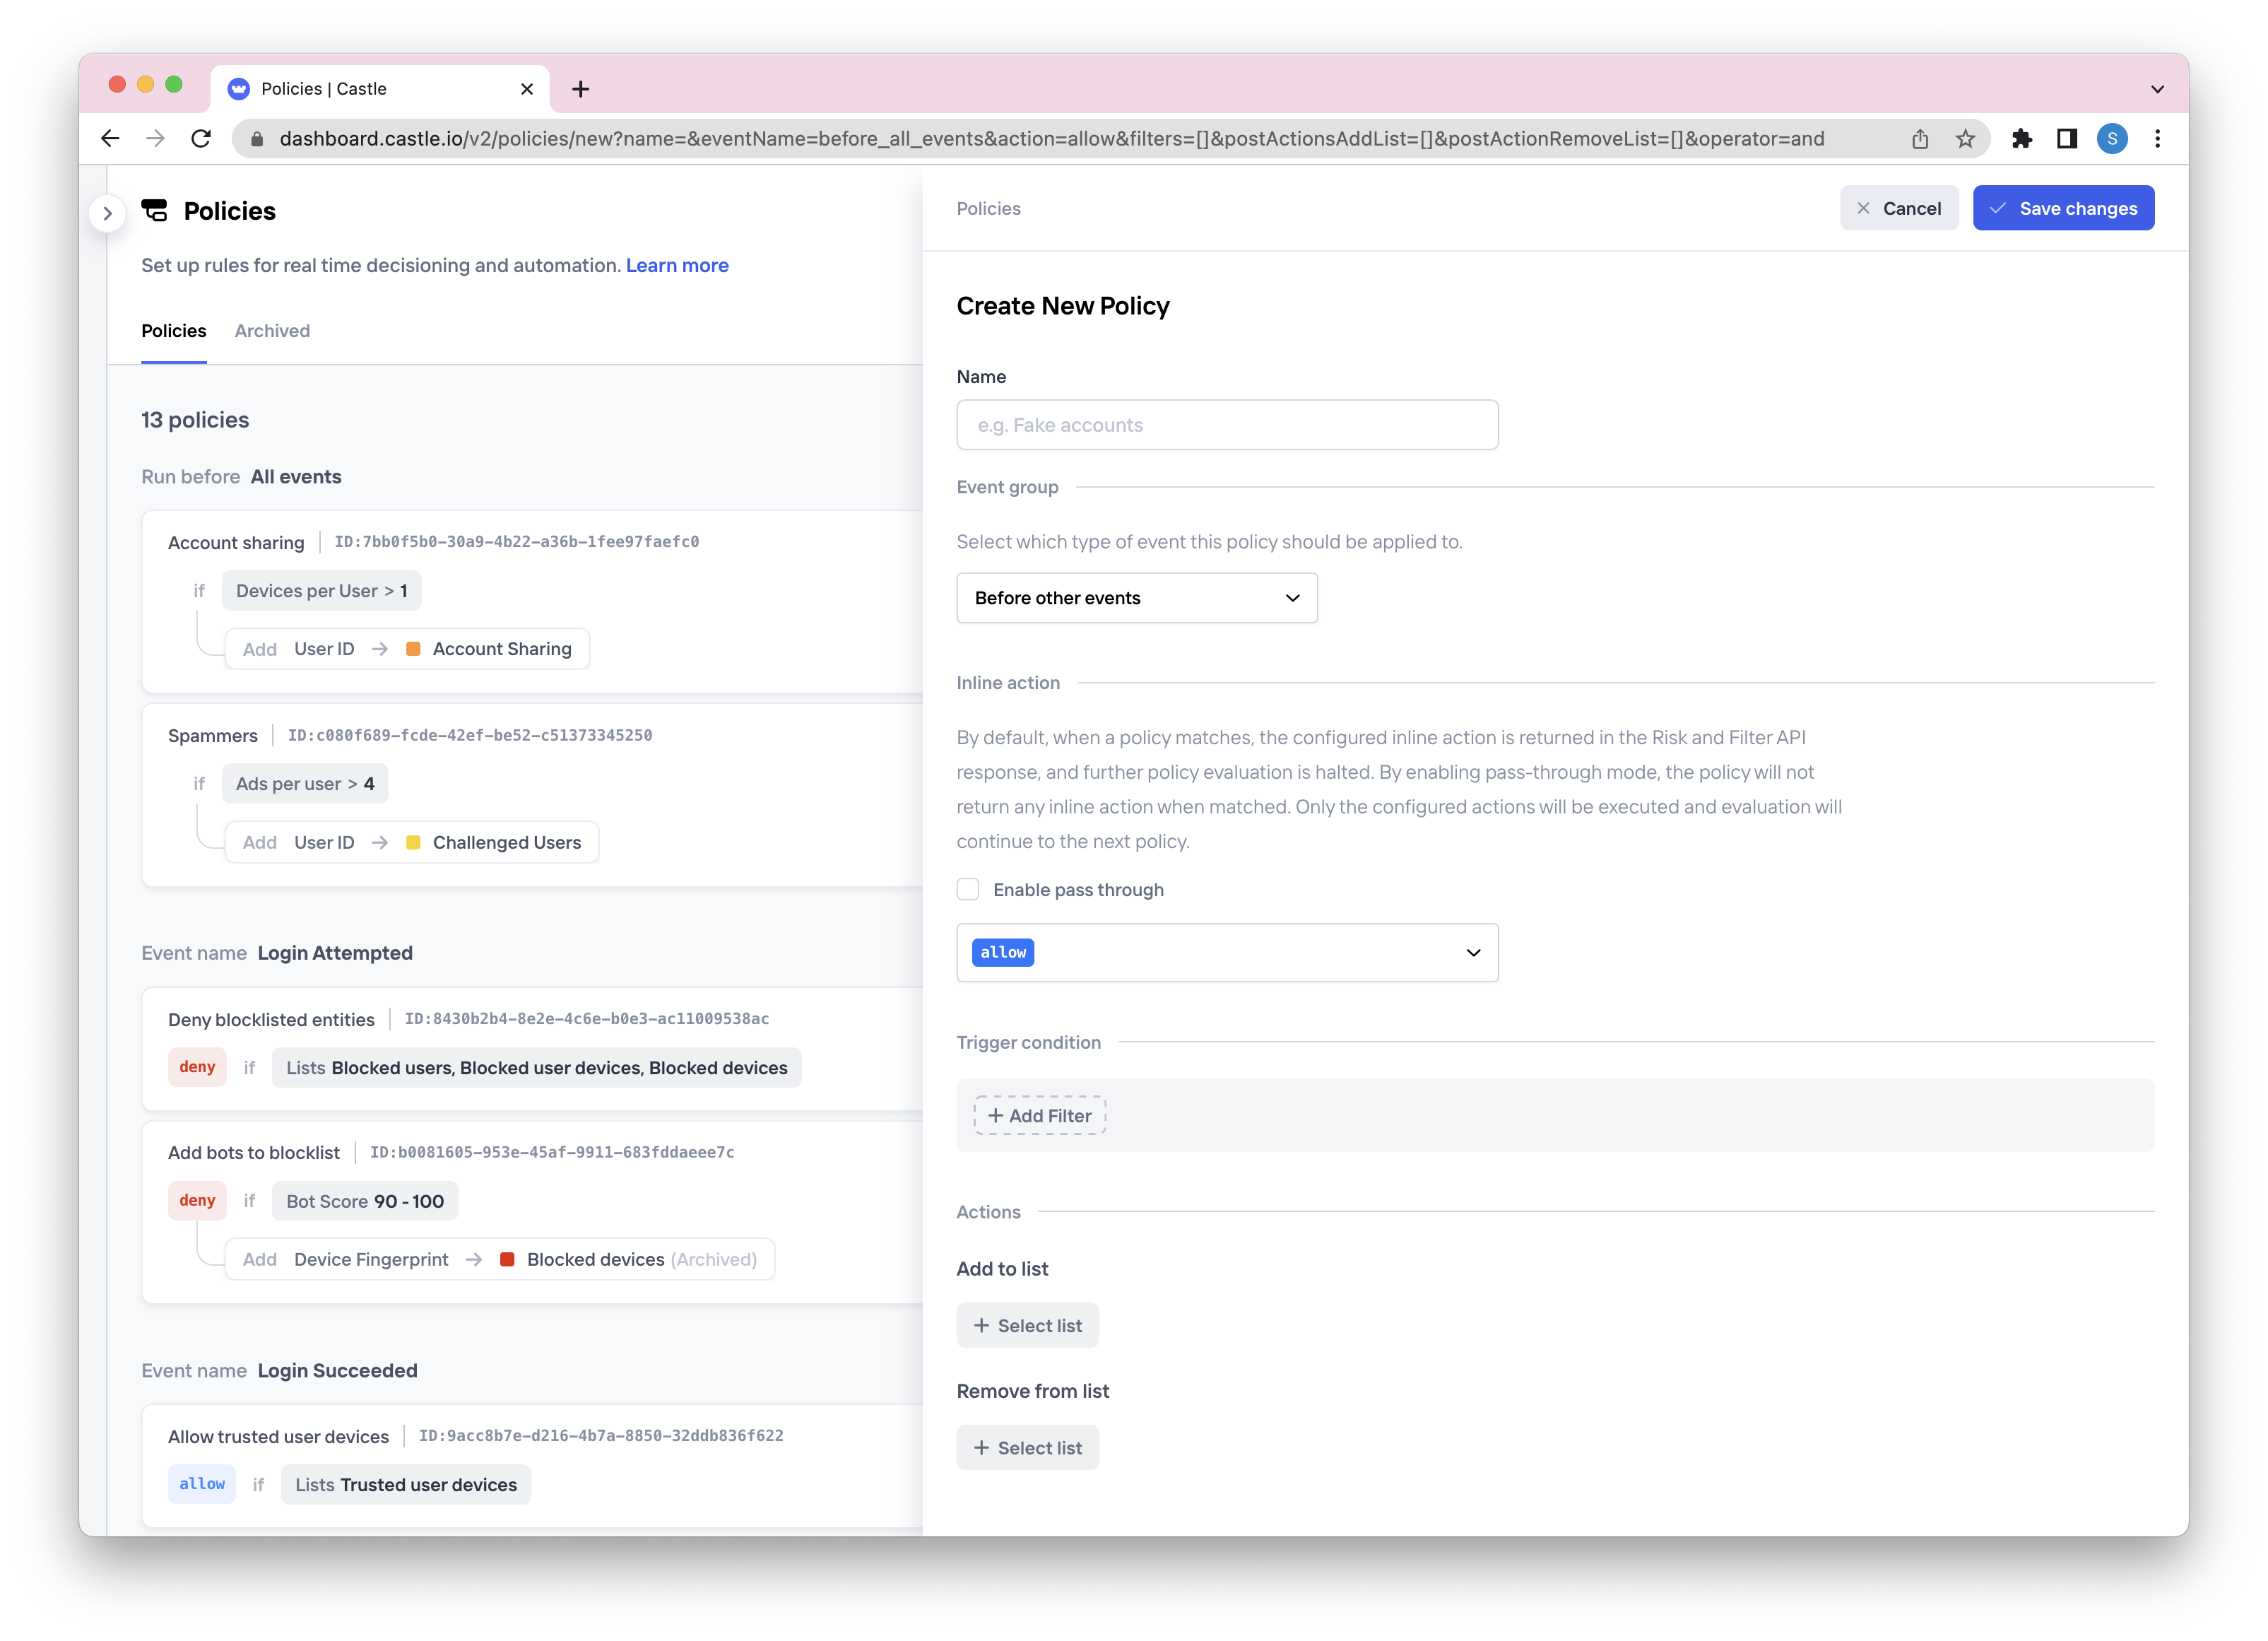
Creating a new policy
Pass-through mode
By default, when a policy matches, the configured inline action is returned in the Risk and Filter API response, and further policy evaluation is halted. By enabling pass-through mode, the policy will not return any inline action when matched. Only the configured actions will be executed and evaluation will continue to the next policy.
When the pass-through policy is matched, all configured actions will run as normal (see below). So by turning off the inline response, you can set up a flow that e.g. simply monitors for suspicious behaviors without affecting the user journey, which is useful before deciding to take action. When a Policy is configured in pass-through mode, the evaluation of Policies will continue until there is a match on a regular, non-pass-through, policy.
Add to lists
Optionally, you may choose to add the values of the triggering to a corresponding list, like e.g. add the user.id to a review list or block list, whenever the Policy matches. This together with webhooks opens up for flexible automation, such as automatically suspending malicious accounts.
Remove/archive from lists
Similarly to adding items to lists, Policies can also be set up to remove/archive items from Lists whenever a Policy match.
Step 3. Enable and reorder
To complete this step:
- (Optional) Reorder the policy to an appropriate position
- Enable the policy
When you have multiple Policies for the same event, there is no harm in having policies overlap in their triggers or definitions, but Policy ordering becomes very important. You will notice that Castle's default policies enable deny verdicts for risk score ranges 90-100, and challenge verdicts for risk score ranges 60-100. This is fine, as long as the deny policy is evaluated before the challenge policy. Otherwise, if the deny policy were below the challenge policy, the deny policy would never have a chance to evaluate to true because the challenge policy would always be the first-matched policy for that event.
The most important thing to consider here is that policies are evaluated in top-down order. For most cases, this means thatdeny policies should be ordered above challenge policies. If you are unsure about the effects of reordering your policies, you can create Log Only policies to evaluate these effects before modifying the "real" enabled policies.
Updated 8 months ago